
I’m glad you’re back for more! If you want integrate your Active Directory / LDAP into Kubeflow within TKG Clusters you’ve found the correct blogpost.
What is this blogpost about?
In a short summary, Kubeflow / Dex will be configured to utilize our Active Directory with an LDAP connector for authentication.
Additionally, I’ll teach you how to quickly explore your possibilities regarding the LDAP binding. And if that’s not enough: We’re going to fully integrate our Active Directory (AD) into Kubeflow (Would be much easier without PodSecurityPolicies).
What do I need to follow this blogpost?
In my last post I’ve set up Kubeflow within a TKG Cluster, so… there’s that. Today, we’ll further configure Kubeflow. Theoretically, you don’t need Kubeflow in a TKG Cluster, only Kubeflow. Futhermore, you’ll need some of the following stuff
- ldap-utils (for a quick scan regarding possible values for the configuration file, but not necessary)
- A LDAP / an AD Account, with read access for the connector
- A test AD account (e.g. your own)
- openssl when you want to set up SSL (which I highly recommend, because security) and want to validate some information
Steps to reach our goal
Less steps than the last post, but not for free!
- Check LDAP / AD access
- Obtain possible LDAP / AD attributes
- Setup LDAP / AD access
- Check functionality of the authorization
- Create Profiles with corresponding Namespaces, based on all accounts in your domain
1 Check LDAP / AD access
You must have some information at this point. I can’t tell you them. When you’ve obtained these, we’re going to explore all the other information, so you can work on your own again. Please make sure you have these:
- What is the distinguished name of the read only AD/LDAP user
= e.g. >cn=Kevin Lastname,ou=examplegroup,dc=vdi,dc=sclabs,dc=net - What is the password of this account
- What is the OU of all the users, we’ll want to give access to Kubeflow
- IP/Hostname of AD
With this information we can scan LDAP for all other necessary information.
For now, we’re going to utilize the command line tool ldapsearch:
#install ldapsearch & openssl
sudo apt install ldap-utils
sudo apt install openssl

#find correct hostname
ldapsearch -H ldap://vdi.sclabs.net
#or if you wanna try TLS/SSL
ldapsearch -H ldaps://vdi.sclabs.net
# giving back an answer: e.g. unknown authentication method
# when wrong host: Can't contact LDAP server

#obtain SSL domain name
openssl s_client -connect vdi.sclabs.net:636 \
-showcerts | grep subject

#In my case the certificate is given for the subject DC1.vdi.sclabs.net
#nothing shows up? maybe SSL/TLS is not configured?

#now that we're sure for that base informations,
#   we'll make a basic access check:

ldapsearch -H ldaps://DC1.vdi.sclabs.net -x -L \
-D "cn=kates,ou=UEMUsers,dc=vdi,dc=sclabs,dc=net" \
-w <passwordRedacted>
#-H hostname of LDAP speaker
#-x use unique identifier + pw for auth against LDAP speaker
#-L a bit more of debugging information
#-D which user for binding (authenticate against ldap) (what is the
#    distinguished name of the user we want to use for binding)
#-w what is the pw for this user
When everythings working as expected, you’ll receive an answer
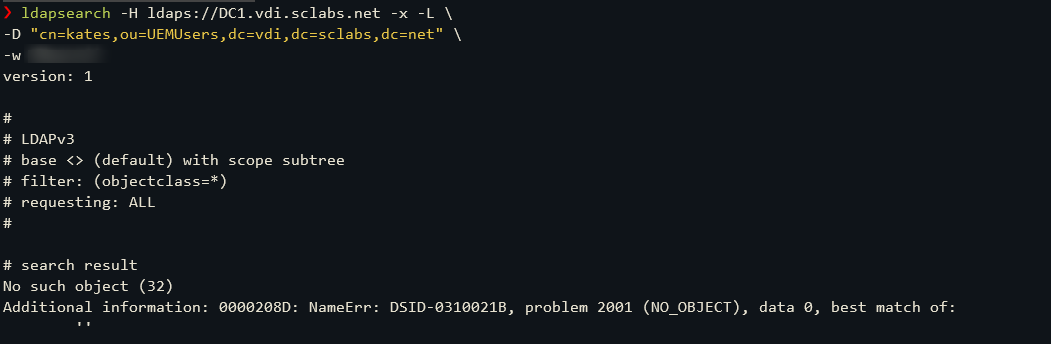
Received message from AD, empty, but an answer
2 Obtain possible LDAP / AD attributes
We can connect, cool. Why do we want to use Dex? It uses OIDC (Open ID Connect). In simple words: Let other services authenticate my users.
Dex utilizes it’s own language, e.g. userAttr for identification; we need to translate it to the LDAP equivalent. What are these attributes of LDAP? Let’s explore them.
ldapsearch -H ldaps://DC1.vdi.sclabs.net -x -L \
-D "cn=kates,ou=UEMUsers,dc=vdi,dc=sclabs,dc=net" \
-w <passwordRedacted> \
-b "cn=kates,ou=UEMUsers,dc=vdi,dc=sclabs,dc=net"
#-b is where we want to search, we could remove the cn=kates, part, but
#    this is only for investigation purposes
The code above yields quite a long answer, a part of that is in the following screenshot
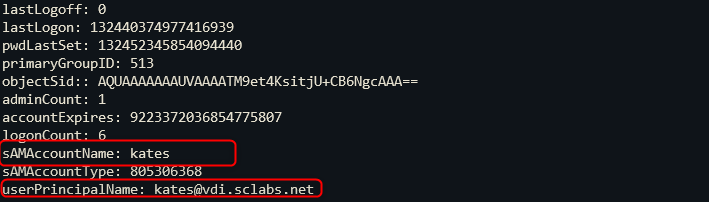
part of all possible LDAP attributes
This screenshot does not show all the attributes. But with the above command you’ll see all possibilities.
3 Configure LDAP/AD
Most of the following code is from the official kubeflow documentation:
What are we going to do?
- obtain actual auth config
- append additional config for auth (LDAP part)
- create dummy configmap from kubectl
- apply dummy configmap against kubectl; let kubectl merge it
- restart auth deployment
You can check here, what additional configuration is possible.
I’ll still highlight briefly, what config does what:
#1. obtain actual auth config
kubectl get configmap dex -n auth -o jsonpath='{.data.config\.yaml}' > dex-config.yaml

#2. create new auth
cat << EOF >> dex-config.yaml
connectors:
- type: ldap
  id: ldap
  name: LDAP
  config:
	host: DC1.vdi.sclabs.net
        #This is the user which has read access to AD
	bindDN: "cn=kates,ou=UEMUsers,dc=vdi,dc=sclabs,dc=net"
        #This is the password for the above account
	bindPW: <pwOfKatesUser>
        #What the user is going to see in Kubeflow
	usernamePrompt: "vdi user + domain, e.g. 'kevin@vdi.sclabs.net'"
	userSearch:
          #Which AD/LDAP users may access Kubeflow
	  baseDN: ou=UEMUsers,dc=vdi,dc=sclabs,dc=net
          #This is the mapping I've talked about and I'll explain again
	  username: userPrincipalName
	  idAttr: sAMAccountName
	  emailAttr: userPrincipalName
	  nameAttr: displayName
EOF
#3 & 4 create dummy configmap and merge with actual
kubectl create configmap dex \
--from-file=config.yaml=dex-config.yaml \
-n auth --dry-run -oyaml | kubectl apply -f -

#5 reapply auth
kubectl rollout restart deployment dex -n auth
The mapping;
We configure Dex / Kubeflow with the mapping „userSearch“
- baseDN: which users may log into Kubeflow
- username: which attribute of LDAP should Kubeflow use as the username; e.g. in my domain:
sAMAccountName = kevin and
userPrincipalName = kevin@vdi.sclabs.net
Be cautious, when you choose these - emailAttr: is used for invitation within kubeflow; e.g. another user may access my namespace; when I provide HIS emailAttr (you may choose an unique identifier, it’s not necessarily an email;
WARNING: If the provided emailAttr is not found on the logged-in user, then Kubeflow won’t proceed. The user may not be allowed to log into Kubeflow! (this is because the mailAttr is utilized as a Profile Identifier, you’ll read more about that later)
You may need to try out different configurations; e.g. using non unique identifier as a username within your domain.
4 Check functionality of ldap authorization
Logout of Kubeflow
We are logged into the admin@kubeflow.org account from the last post. There’s no logout button! You just need to append /logout at the root ip of your Kubeflow installation. For example, your Kubeflow is on 10.4.0.3 then visit https://10.4.0.3/logout
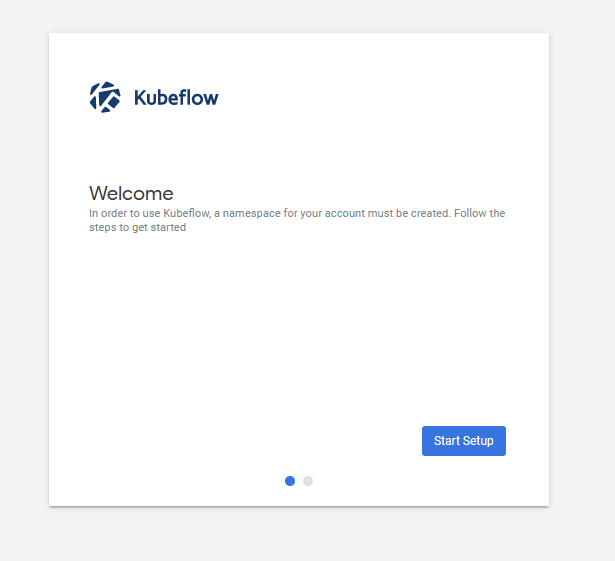
When logged out, you’ll see this website:
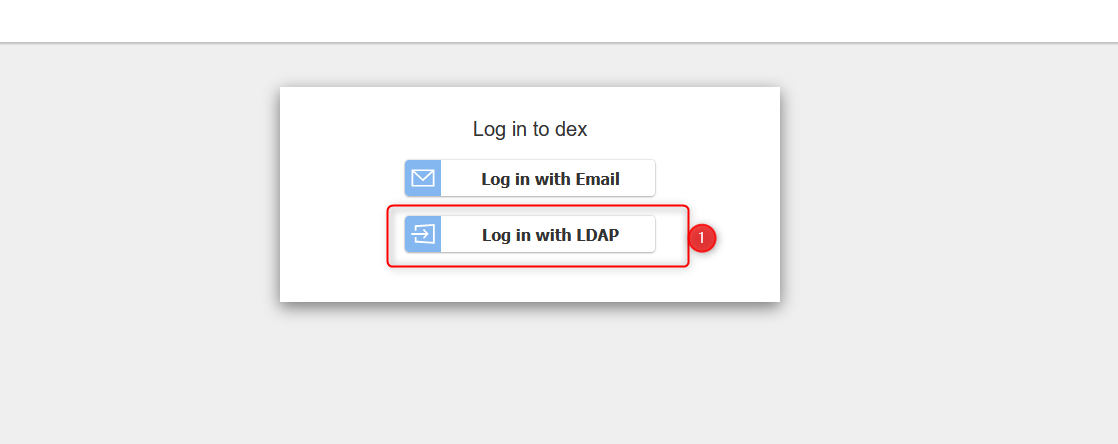
Kubeflow lets you decide between the configured authorization methods
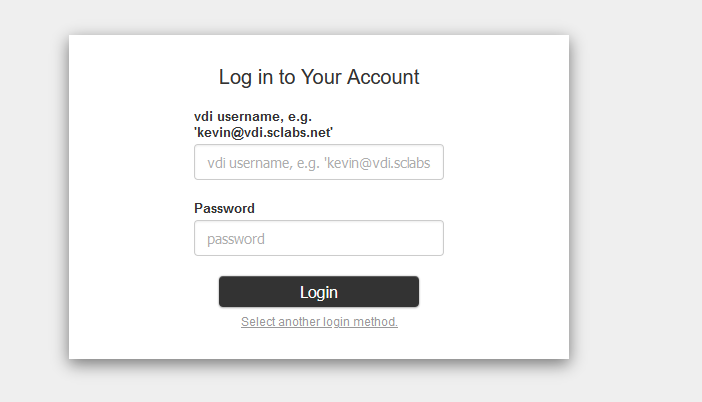
the configured LDAP login
The username hint is only an example for visualization. Choose one based on your desires.
Provide the username based on your mapping and your password.
You’ll immidiately be greeted with the known following window:
first login prompt

first login prompt – choose namespace
For now hit Finish; We’ll fix this issue with ducttape in some seconds. As explained in the last post, we’ll need to fix the PSP for this freshly created namespace.
namespace=kevin
cat << EOF | kubectl apply -f -
kind: RoleBinding
apiVersion: rbac.authorization.k8s.io/v1
metadata:
  name: rb-all-sa_ns-$namespace
  namespace: $namespace
roleRef:
  kind: ClusterRole
  name: psp:vmware-system-privileged
  apiGroup: rbac.authorization.k8s.io
subjects:
- kind: Group
  apiGroup: rbac.authorization.k8s.io
  name: system:serviceaccounts:$namespace
EOF
Everything is set up and running. This is your LDAP authorized Kubeflow account. You can do cool stuff, e.g. allowing each user to utilize only 1 CPU. Cool, mh?
5 Create Profiles for each User in given Domain
Disclaimer: This last step is necessary, only because of the PSPs. Kubeflow does create Profiles on it’s own, when the user first connects. Besides, we get a great example, on how to restrict each user resource usage.
Kubeflow creates a „Profile“ for each user; in this Profile you can set up e.g. the amount of Ressources a user can utilize. This Profile will create a corresponding namespace, we need to add a PSP for this profile.
- Obtain all users from LDAP
- Create a Profile for each user
- Set up a PSP for each User
#The profile is different based on the provided attribute mapping!
#  Therefore proceed with caution
#Because my mailAttr is = "userPrincipalName"
#  the profile identifier is this userPrincipalName
ldapsearchoutput=$(
ldapsearch -H ldaps://DC1.vdi.sclabs.net -x -LLL \
-D "cn=kates,ou=UEMUsers,dc=vdi,dc=sclabs,dc=net" \
-w VMware1! \
-b "ou=UEMUsers,dc=vdi,dc=sclabs,dc=net" userPrincipalName sAMAccountName
)

#the base search path is our organizational unit, you may create a
#  specific ou, if you want to
# after the -b "".. is an attribute, with this we can tell LDAP we only
# want to get this attribute
# this is not filtered down enough, we utilize awk now

#explanation below
acc_list=(
  $(echo $ldapsearchoutput | awk '
  BEGIN{RS=""; FS="\n"}
  {
    aname = pname = ""
    for(i=1;i<=NF;++i) {
      if ($i ~ /^sAMAccountName:/) { aname=substr($i,16) }
      else if ($i ~ /^userPrincipalName:/) { pname=substr($i,20) }
    }

   if (! (length(aname) == 0)) {
     if (! (length(pname) == 0)) {
      print aname "," pname
     }
   }

  }
  ')
)
#RS = Record Seperator; when empty, delimit on empty lines,
#  that's what ldapsearch returns
#FS = Field Seperator, one record has multiple Fields;
#  seperate on newline
#for each field; check if field starts with
#  sAMAccountName; if so, save in aname; same with pname
# finally only print new record, when both fields are not empty


tmpfile="tmpfile.txt"
tmpfile_2="tmpfile_2.txt"
rm -f $tmpfile $tmpfile_2

function create_profile(){
  short_ident=$1
  full_ident=$2

cat << EOF >> $tmpfile
apiVersion: kubeflow.org/v1beta1
kind: Profile
metadata:
  name: $short_ident
spec:
  owner:
    kind: User
    name: $full_ident
   resourceQuotaSpec:
     hard:
       cpu: "2" #restrict user resource usage to 2 cpus
---
EOF
}

function create_psp(){
namespace=$1
cat << EOF >> $tmpfile_2
kind: RoleBinding
apiVersion: rbac.authorization.k8s.io/v1
metadata:
  name: rb-all-sa_ns-$namespace
  namespace: $namespace
roleRef:
  kind: ClusterRole
  name: psp:vmware-system-privileged
  apiGroup: rbac.authorization.k8s.io
subjects:
- kind: Group
  apiGroup: rbac.authorization.k8s.io
  name: system:serviceaccounts:$namespace
---
EOF
}

for user in $acc_list[@]; do
 aname=$(echo $user | cut -d , -f 1 | awk '{print tolower($0)}' | tr "." "-")
 #uppercases are not allowed
 #dot in name will not create a namespace; only the profile
 #there may be more restrictions..
 pname=$(echo $user | cut -d , -f 2)
 create_profile $aname $pname
 create_psp $aname
done
kubectl apply -f $tmpfile

#apply as often as necessary; finished, when profile hook created each namespace
counter=0
while ! kubectl apply -f $tmpfile_2; do
	sleep 5
    counter=$((counter+1))
	if [ $counter -gt 20 ]; then
      echo "waited long enough, somethings fishy here.., please check"
      break;
    fi
done

rm -f $tmpfile $tmpfile_2
When the script finishes, we’ll immidiately check the set up restrictions in Jupyter Notebooks. I’ve requested 3 CPUs and all users only are allowed to utilize 2 CPUs. That was easy! We could attach another namespace with greater Resource Quota, attached to all Users. Giving a shared, high-performance environment!
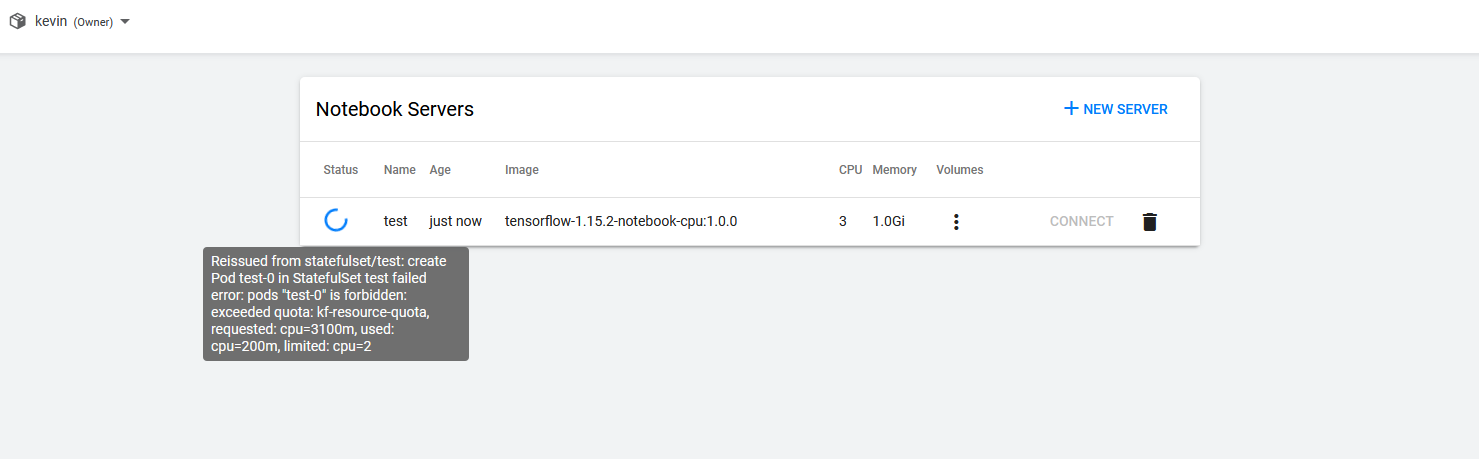
Kubeflow telling the user his resource usage is limited, he requested to much and that it won’t proceed
Final words
These PSPs are straining the ease of use from Kubeflow. It’s only a ducttape solution. I’ll recheck all the possibilities of PSPs and will find another, more durable solution. But for now, all your users can utilize Kubeflow, when started within a TKG Cluster.
I’m really glad, that I can experience new facettes of programming, though. It’s fun exploring more complex Bash solutions with e.g. awk.
Thanks for reading!
Recent Comments