
Step 4, Workflows
After having created the Dynamic Types in the last blog post, it is time for some coding this time. Remember, we have four different workflows: The find-by-id, the find-all, the find-relation and the has-relation one:
- In the find-by-id workflow, we search for a AWS stack by id (fortunately the stack has a property called “StackId” that contains an unique String, that definitely identifies a stack).
- In the find-all workflow, we obviously search for all stacks.
- In the find-relation workflow, we look for child items in the hierarchy which means, we simply call the find-all workflow in the hierarchy beneath.
- The has-relation workflow checks if the find-relation workflow provides some values or there is a nested folder.
The last two are relationships are the most simple ones, hence we will start with them:
The has-relation workflow
Let’s edit the “Has CloudFormation-Stack Children In Relation” workflow and go to the Schema tab. Move on to the “Scriptable task” and edit it: First, we have to check if there is a nested folder:
if(parentType.split(".")[1] == "stackFolder" && relationName == "stackFolder - Stack") folder = true;

The variable “parentType” is predefined and contains the current namespace and the current dynamic type in the format “namespace.type”, so we have to split it into two parts in order to get the type directly.
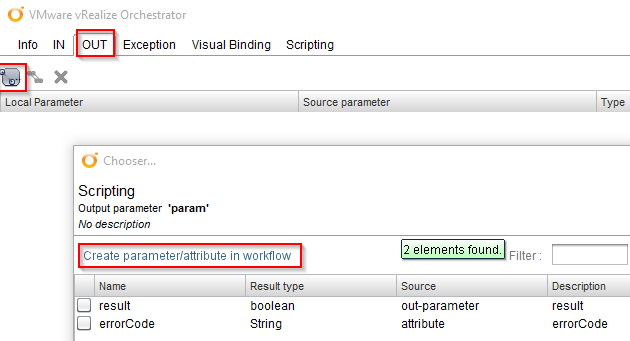
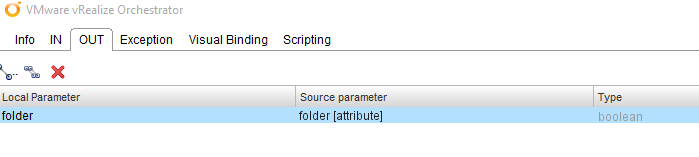
The variable “folder” is not predefined, so we have to go to the “OUT” tab, delete the “result” entry and create a new attribute called “folder” with a Boolean type. To create a new attribute directly, we can use the link “Create parameter/attribute in workflow”.

Back in the workflow we drag and drop a “Decision” and two new “Scriptable tasks” in the schema:
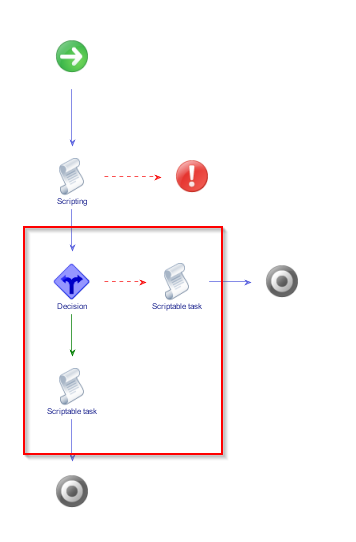
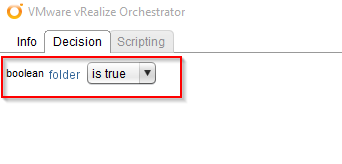
We edit the “Decision” and check, if “folder” is “true”.
Then we edit the “Scriptable task” after the red arrow and simply type:
result = false;
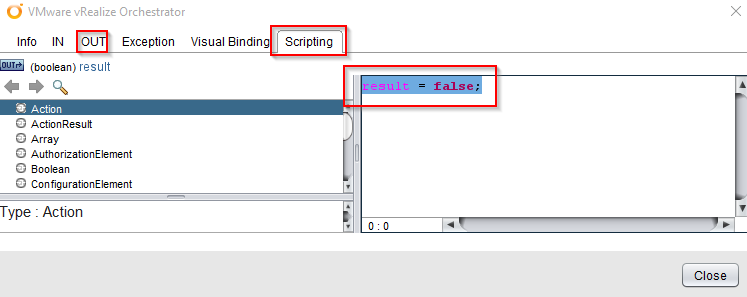
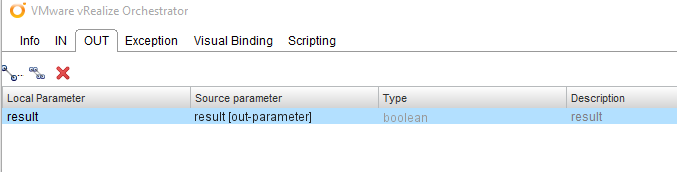
In the “OUT” tab we have to add the “result” attribute again.
In the green branch, we have to check if there are any already stacks (we can know that by invoking the find-relation workflow). So we drag and drop a “Workflow element” task from the toolbox onto the green arrow and place it after the “Decision” node.
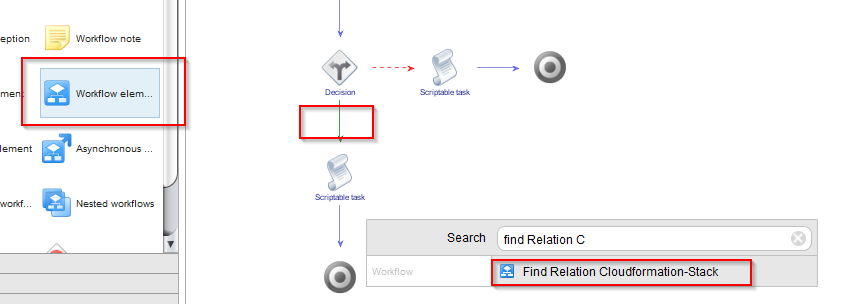
In the search box, we search for “Find Relation Cloudformation-Stack” and select the appropriate workflow.

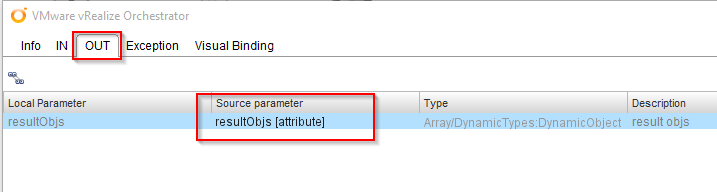
This element also has to be configured, so let’s edit it, go to the “OUT” tab and fill the missing variable with a new attribute.
In the last “Scriptable task” we have to check if there are values in “resultObjs” variable, so we edit it, go to the “IN” tab to add it.
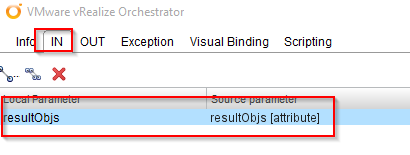
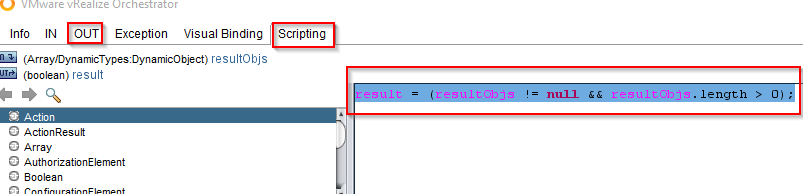
Then we go to the “OUT” tab and add the “result” again (as we have done before). In the “Scripting” tab we type:
result = (resultObjs != null && resultObjs.length > 0);
After having saved, we finished our first workflow!
In the next workflows, I will more focus on the code and less at the vRO elements. The next workflow should be our find-relation workflow.
The find-relation workflow
This is our “Find Relation Cloudformation-Stack” workflow so we edit it and switch to the “Schema” tab. Once again we check if the call wants to find children of the folder or children of the stacks, so we provide the following code:
if(parentType.split(".")[1] == "stackFolder" && relationName == "stackFolder - Stack") folder = true;
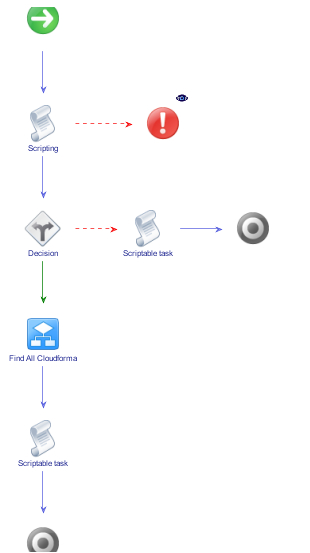
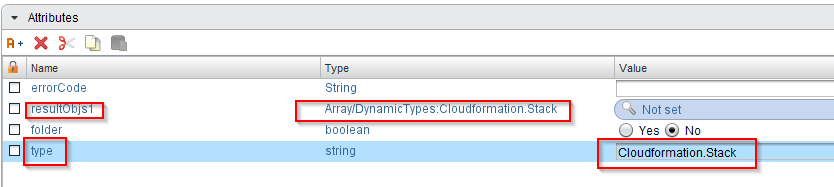
Like before we add a new attribute called “folder” in the “OUT” tab. The next steps are very similar as well: We drag and drop the “Decision” and the two “Scriptable tasks” into the workflow and we put a “Workflow element” onto the green branch, but this time, we look for the “Find All Cloudformation-Stack”. For the output, we create a new attribute, for example “resultObjs1”. As input, we create a new attribute “type” with the value “Cloudformation.Stack”.
In the “Scriptable task” in the green branch, we add “resultObjs1” in the “IN” tab and “resultObjs” in the “OUT” tab and set the second as the value of the first:
resultObjs=resultObjs1;
In the “Scriptable task after the red arrow, we type:
if(relationName == "namespace-children") {

resultObjs = new Array();

var object = DynamicTypesManager.makeObject("Cloudformation", "stackFolder", "stackFolder", "stackFolder");

resultObjs.push(object);

}
Next, add resultObjs in the “OUT” tab and relationName in the “IN” tab. This code creates the dummy folder object as default base item. The “relationName” is again a predefined variable that contains the current relation. If its value is „namespace-children“, it looks for the top item in the hierarchy directly below the namespace.
With these two workflows, we already should see our base folder item in the inventory.
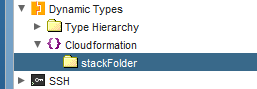
If the hierarchy is still empty after refreshing, you can use System.log() in the code snippets above to troubleshoot tThe find-relation workflow automatically should run, after clicking on the little arrow left of the namespace “Cloudformation”)
The find-all workflow
In the find-all workflow, we have to differentiate between a folder and a stack. Hence, in the first Scriptable task we type:
if(type.split(".")[1] == "stackFolder") folder = true;

if(type.split(".")[1] == "Stack") stack = true;
Create boolean attributes for the folder and stack in the “OUT” tab (two variables for two decisions, so we need a second decision in the workflow, the rest is again very similar as before):
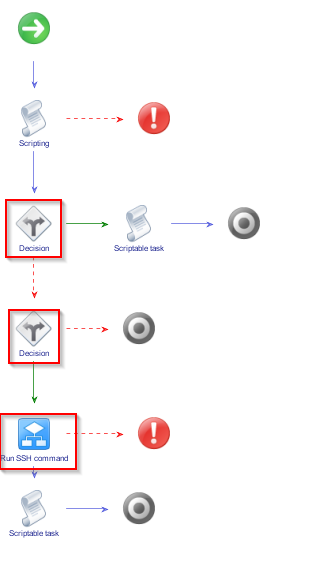
In the first decision we check, if “folder” is true, in the second decision we check, if “stack” is true. this time, the embedded workflow is the “Run SSH command” workflow. In the Scriptable task after the first decision, if “folder” is true, type:
resultObjs = new Array();

var object = DynamicTypesManager.makeObject("Cloudformation", "stackFolder", "stackFolder", "stackFolder");

resultObjs.push(object);
And we add “resultObjs” in the “OUT” tab. This again makes sure, that we see the dummy folder item. The “Run SSH command” workflow has to be configured, of course, for it we need several input and output attributes:
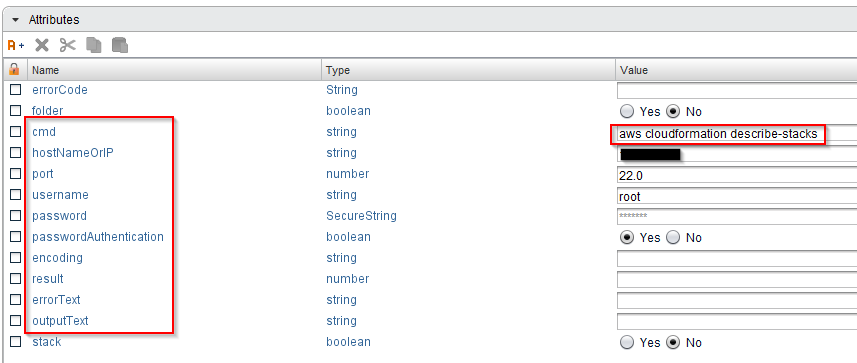
The “cmd” attributes contains the command, which we want to send to our Linux proxy machine that we prepared in the second blog entry (we need the hostname or IP, the SSH port, the username and password for that machine). In my case, I want to connect with the standard username and password, so we need a Boolean value “passwordAuthentication” set on “Yes”. The last input parameter is “encoding”, we need it, but it can be empty, so it uses the default encoding. The attributes “result”, “errorText” and “outputText” are output variables for the workflow. The remaining input parameters “path” and “passphrase” can be set to “NULL”.
As we stated in the second blog post, this call will returns all current existing AWS Cloudformation Stacks in JSON format, so we need to parse this now. In the last Scriptable task, we add the attributes “result”, “outputText” and “type” in the “IN” tab and “resultObjs” in the “OUT” tab and in the “Scripting” tab we type:
if(result>0){

var typename = type.split(".")[1];

var namespace = type.split(".")[0];

resultObjs = new Array();

var summary =  JSON.parse(outputText);

for each (var obj in summary.Stacks){


var stackid = obj.StackId.toString();

var stackname= obj.StackName.toString();

var dynobj = DynamicTypesManager.makeObject(namespace , typename ,stackid , stackname);

var status = obj.StackStatus.toString();

dynobj.setProperty("status",status );


resultObjs.push(dynobj);

}

}
The JSON output of “outputText” can simply be parsed by “JSON.parse()”. In the resulting “summary” object, we now can iterate through all the stacks. Each stack has an ID, a name and a status that we can use to create new dynamic objects and add them to the result array.
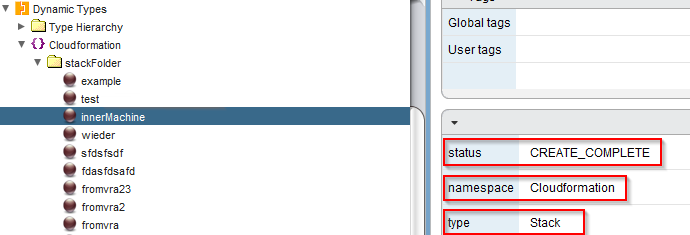
It will take a little moment to see the results in the Dynamic Type hierarchy. (this could be accelerated with caching, perhaps I will talk about that in a later blog post). If your stacks doesn’t appear, you can investigate the workflow tokens, that were called by the system and you always can use “System.log()” in the code sections.

One workflow is still missing, the find-by-id workflow. We will create it in the next blog post together with the “create” and “delete” workflows which we need for our custom resources later. For now, I think it is enough.
Stay tuned to the next posts!
Recent Comments