Step 3, Dynamic Types
This time we want to create the Dynamic Types as an abstraction layer for the real CloudFormation stacks. In the last blog entry, we defined the way how to communicate with AWS and in this article we will build the appropriate workflows in Orchestrator.
First, we should reflect the concept of dynamic types. Dynamic types are objects in vRO that can be created via workflows. First of all, a dynamic type needs a namespace. Once we have defined the namespace, we can create the dynamic type itself. This is relatively generic, as every dynamic type consists of a name and a description. Dynamic types only differ in additional custom properties, so we need to specify all the data we want to see in our dynamic type. We also have to specify the logic how the dynamic type finds data by Id, how it finds all of the data and if and how it finds out its hierarchical structure.
The idea behind that is that every dynamic object represents a real object – in our case a stack – and that this relation is not decoupled. Thus every call to the object always validates if the original data is still there. So, if I delete a stack in the AWS website, it will also disappear in my list of dynamic objects. The custom resources we talked about in the first blog post work the other way round. vRA saves the custom resource and you should always manage the objects by the vRA. Because if you delete the real representation outside of the vRA, the related custom resource will stay but will be invalid. In the worst case it will be stuck, as the real object is no longer there and thus the deletion will cause an error and the custom resource will not be deleted.
Well, it may sound a little bit strange that we have to use both of these contrary philosophies at the same time, but we will get it to work. Now we focus at the dynamic type itself.
There is one last thing we have to sort out: Theoretically, we only need one dynamic type for our simple mapping to AWS stacks, but unfortunately dynamic types always have to be related, so there always have to be at least one parent type and one child type. For us, that means that we need to create a dummy dynamic type that doesn’t represent anything real and only works as a folder for our “real” stack dynamic type. To make it simple, we will use the same workflows for both of the types.
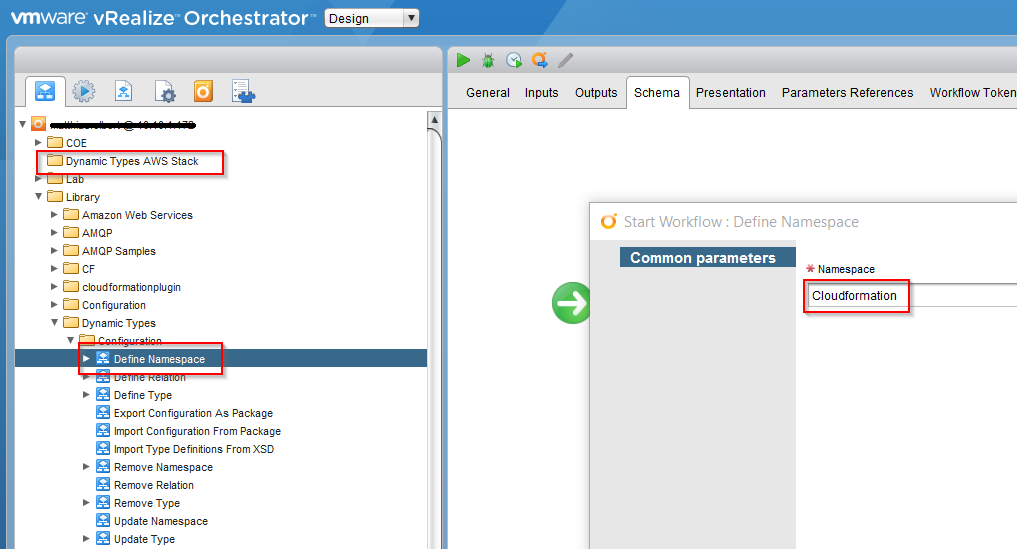
Let’s start with the stack type. As preparation we create a new workflow folder named “Dynamic Types AWS Stack” and call the workflow “Define Namespace” in the “Library > Dynamic Types > Configuration” folder. The namespace just needs a name, so we call it “Cloudformation”.
In the same folder, we then call the “Define Type” workflow and use the namespace we have just created, the name “Stack” and any kind of icon (that’s for the presentation in the inventory). As custom property we use an attribute called “status” for a start. Here we could now create several additional properties, but we want to keep it simple for now.
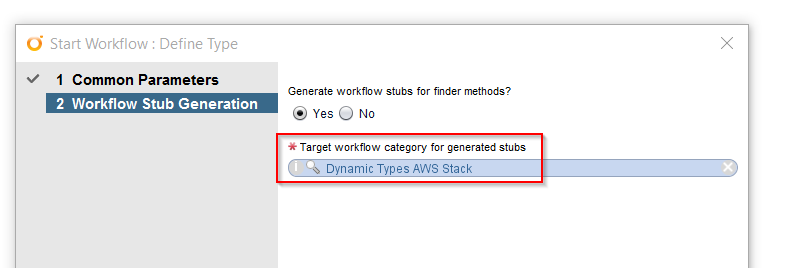
After clicking the “Next” button, we can define where the workflow generates the stubs for our self-developed workflows and, of course, we choose the folder we created before. Next, we can submit.
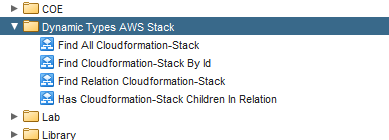
When everything has completed successfully, we should see the pre-created workflows. Unfortunately, they’re all empty and now the real work begins.
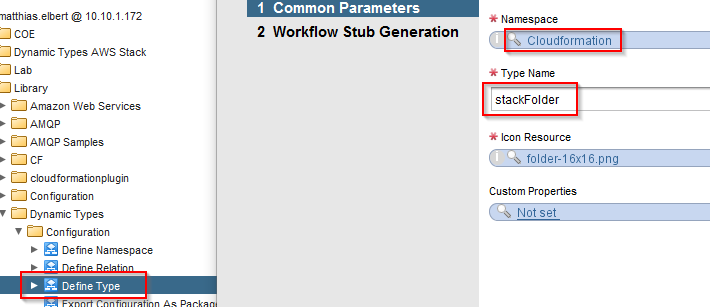
As I said before, we need an additional “folder”-type with the same workflows, so we again call the “Define Type” workflow and use the namespace we created previously. This time the name should be “stackFolder”, we again need an icon and this time no custom properties.
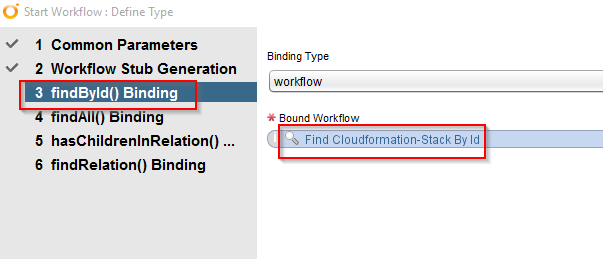
In the next step, we change the “generate stubs” radio button and manually choose the workflows we generated before.
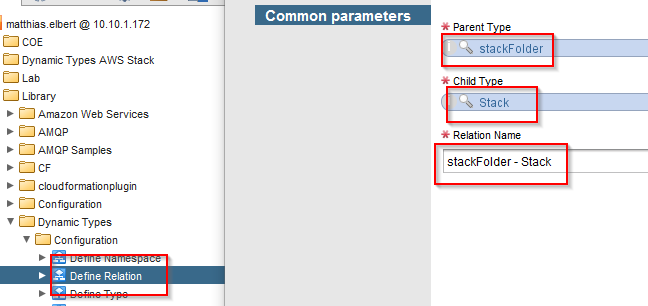
Ok, now we have to relate these types. For that we start the workflow “Define Relation”, choose our types and the name “stackFolder – Stack”.
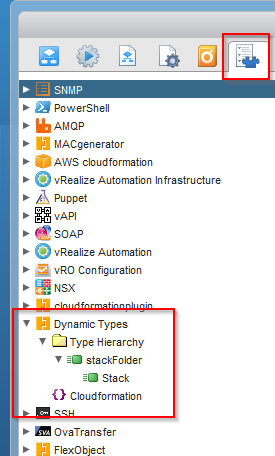
We can now see the outcome in the inventory. We should now see that the type “Stack” is a child of the type “stackFolder”.
Obviously a stack object does not exist there yet, because the workflows are still empty. So the next step is to build these workflows, but that we will do in the next blog post.
Have fun!




Trackbacks/Pingbacks