
In this blog post, I want to explain the process of automatically configuring your resources after, or during your vRealize Automation deployment.
vRealize Automation offers the Subscription function, through which a vRealize Orchestration Workflow or an ABX Action can be bound to certain vRA events. The Subscription acts as an interface between vRA and vRO and allows to pass deployment information from vRA directly to vRO, where the deployed resources can be further configured.
To create a Subscription, go to the vRealize Automation – Cloud Assembly GUI, there you have to click on the Extensibility tab and on the left side you can see the menu point Subscriptions.

After you pressed the New Subscription button, you have to give your new Subscription a unique name and a precise description.
With the Status toggle you can enable or disable your Subscription.
In the Event Topic section, you must select a fitting Event Topic, which activates your Subscription. Event Topics represent the steps that a resource has to go through when it gets deployed, for example Compute allocation, Disk attach or Compute initial power on. To get a better overview for the available Event Topics, you can go to the left menu and select the Even Topics point in the Library section, here you can get more information about the Event Topics and when they occur. After you selected an Event Topic, you can expand the Parameters section to see all the available parameters that are automatically submitted to your workflow or action.
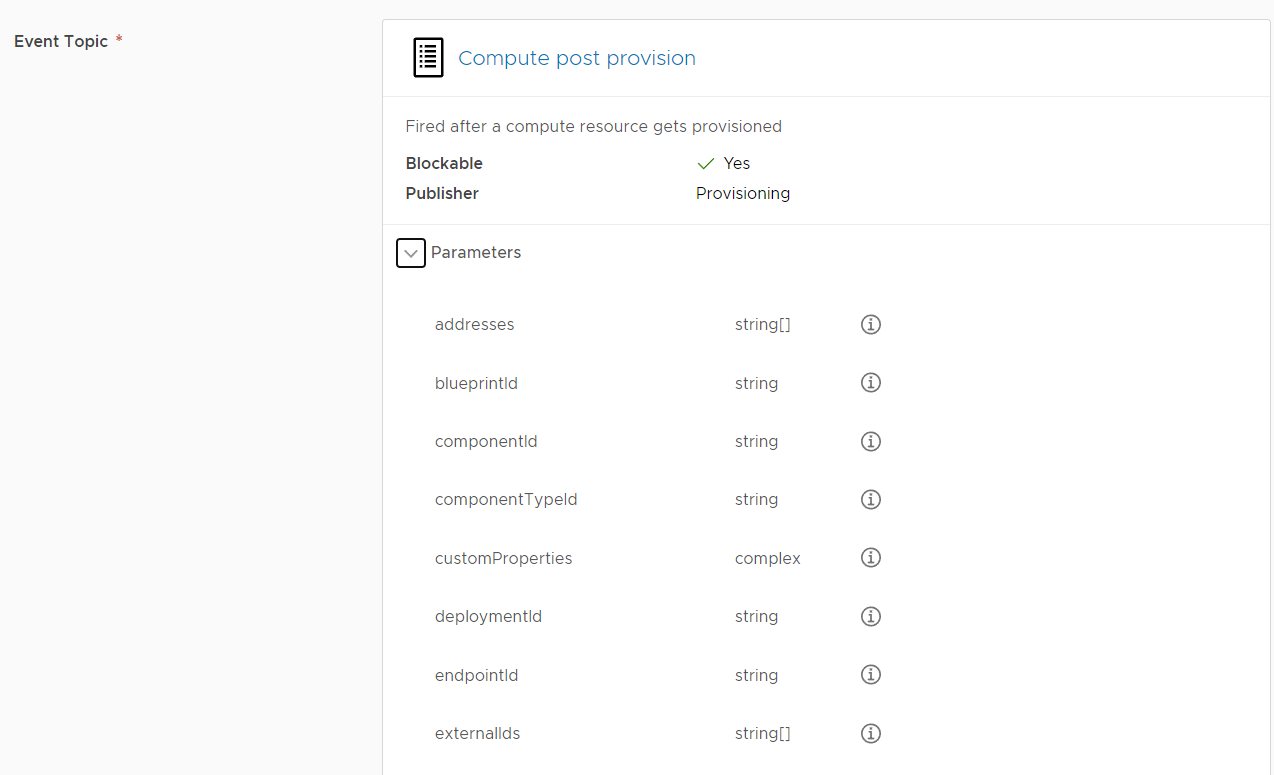
You will notice a parameter with the name “customProperties”, this is an array with all the custom properties you specified in the Cloud Template.
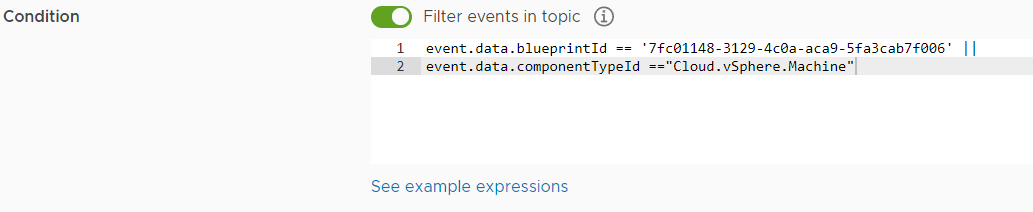
In the next section Condition, you can specify filters for your Subscription, for example if you just want the Subscription to react to certain Cloud Templates or specific Tags, the syntax for these filters look as follows:
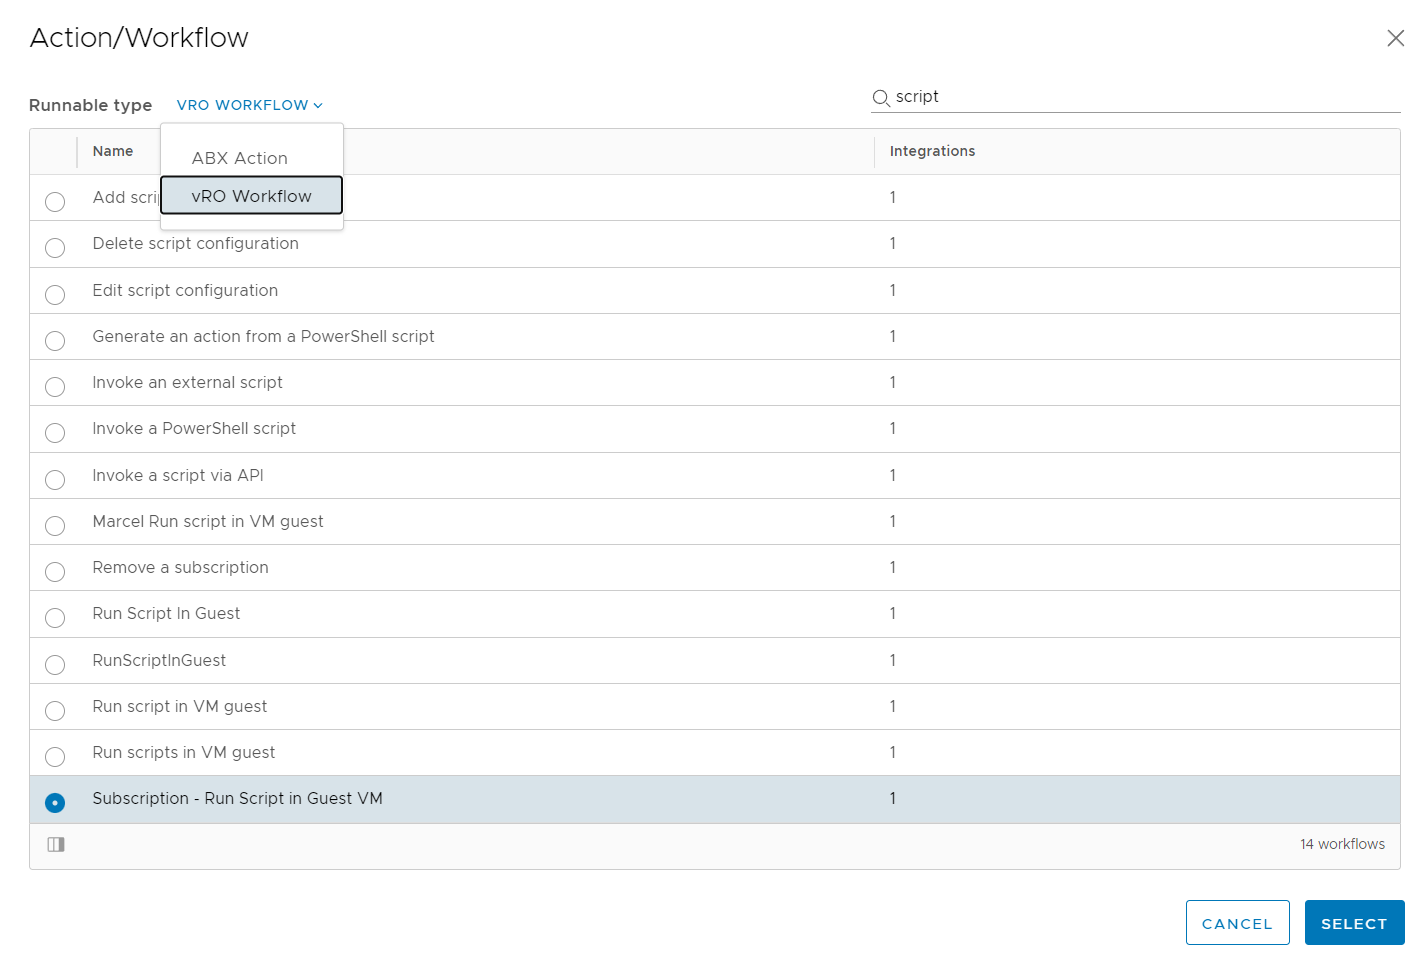
After that you have to add the Workflow or Action, you want to be executed when the Subscription is triggered. Click on ADD, at the top of the window you can see a drop-down menu where you can switch between ABX Actions and vRO Workflows.
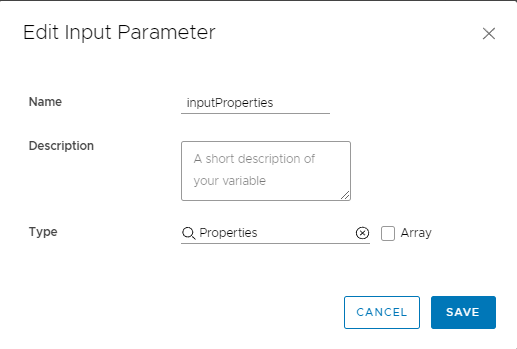
 It is important to know that any Workflow you want to use, has to have an input variable called „inputProperties“ of the type „Properties“ .
In the Blocking section you can specify if you want your Subscription to temporarily block the execution of other Subscriptions. Additionally, you can add a recovery Action/Workflow that gets executed when the primary workflow fails.
Lastly you can decide if your Subscription should be available to all projects or just a specific project. After that hit Save and your Subscription will be created.

Now that you’ve created your Subscription, I want to show you how you can access the information and variables from your vRealize Automation deployment in your vRrealize Orchestrator Workflow or ABX Action.
vRealize Automation Workflows:
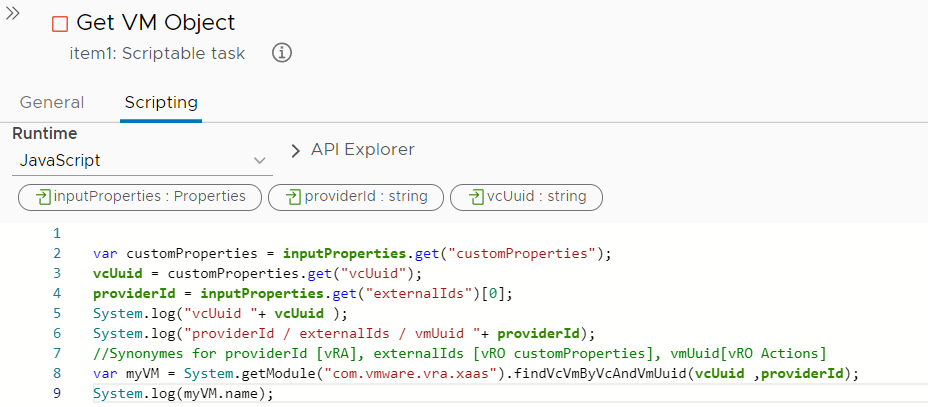
As mentioned, your Workflow needs to have an input variable called “inputProperties” of the type “Properties”. This variable contains all your deployment information as an Array.
To access your CustomProperties Array, you first have to load it, before you can work with its contents:

In case you want to work directly with a vSphere Virtual Machine Object, the easiest way to get that Object is by extracting the “providerId” and “vcUuid” data out of the customProperties Array and call the vRO Native Action “findVcVmByVcAndVmUuid” with those values. This action will return an object with the type “VC:VirtualMachine”.
ABX Actions:
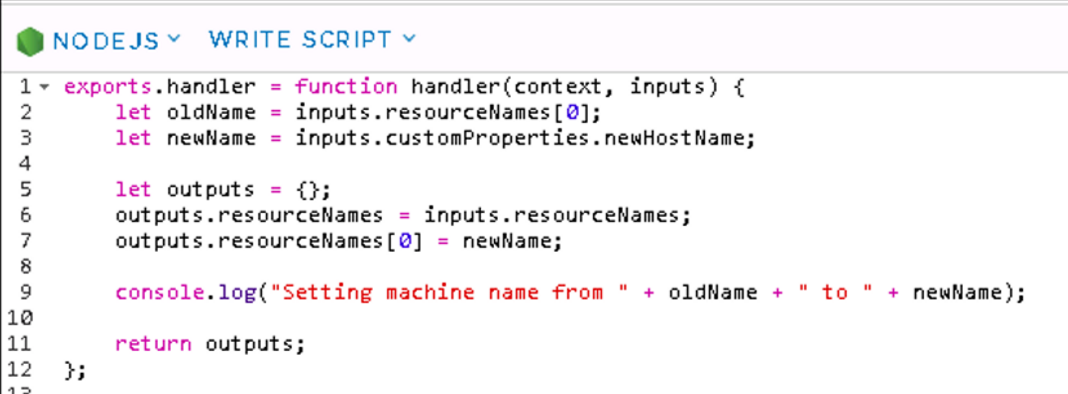
In this example I’ll show a NodeJS ABX Action. You have to configure the handler to expect an input parameter. After that you can simply access the information in the Array input parameter with dot notation. Your output variable should be loaded before filled with data.
Congratulations you now know everything you need to create Subscriptions and bind them to your vRO Workflows or ABX Actions to customize your deployments.
Recent Comments