
The first and most easy way to use a Network Profile, is to deploy in an existing network. In that case there are no network components that needs to be created on the fly, hence the configuration is easy.
The following instructions will show how to create a Network Profile and configure it accordingly.
- Go to the Infrastructure > Network Profiles page and click on [+ New Network Profile]
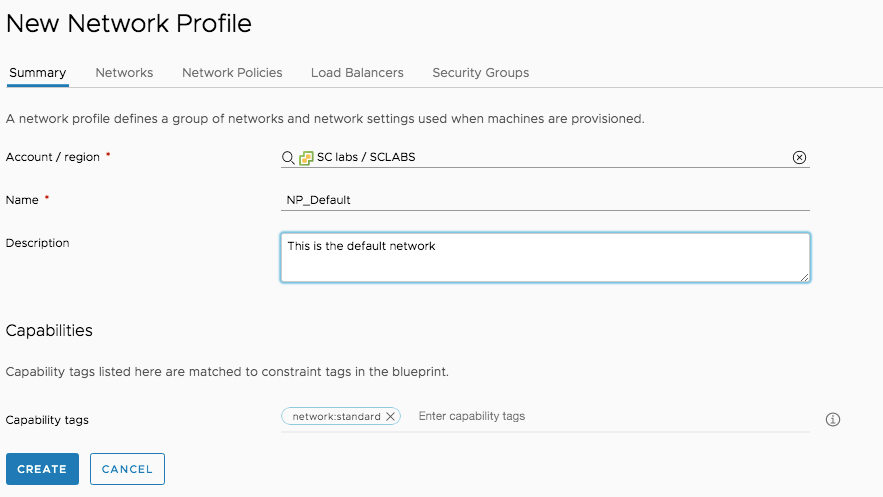
- On the Summary page, provide the following information:
- Account / region
- Name
- Optionally a description
- Capabilities, which have to match constraints on a blueprint
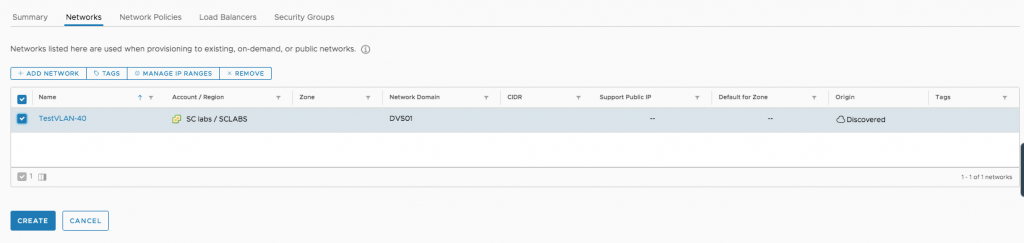
- On the Networks page, add the appropriate existing networks. Remember, if you have more than more network, tags can be used as blueprint constraints in order to match to tagged networks to avoid ambiguity.
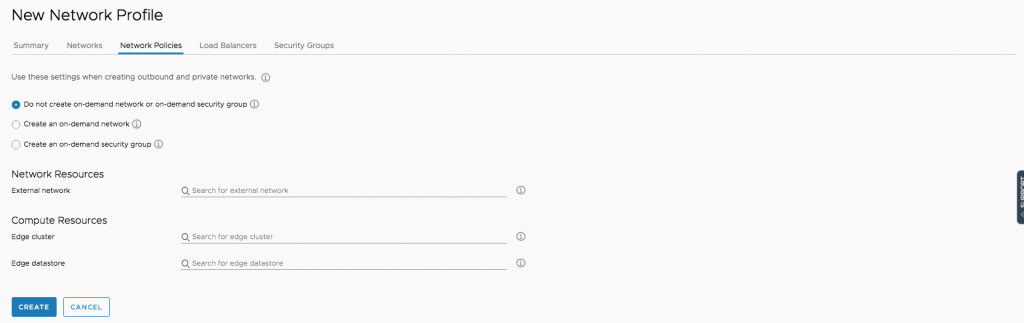
- On the Network Polices page, there is no need to do perform any configuration.
- Click on Create
Once the network profile has been created, you can go to the blueprint and add a Network element. The following yams shows the code, for an ElasticSearch Deployment (we skip the code to install ElasticSeach) that goes to a specific existing network (we use tags to identify the currect network profile):
formatVersion: 1
name: ElasticStack
version: 1
description: Installs Elastic Stack on a single machine
inputs:
  image:
    type: string
    enum:
      - ubuntu1604
      - Ubuntu1804
    description: Image/OS required
    title: Image/OS
    default: Ubuntu1804
  flavor:
    type: string
    enum:
      - small
      - medium
    description: Choose the size of the machine
    title: Flavor
    default: medium
  network:
    type: string
    title: Network
    description: Input the network tag information
    default: 'network:vlan41'
  region:
    type: string
    description: Input the region that the resources belong to
    title: Region
    default: 'region:sc-central-1'
  key:
    type: string
    title: Public Key
    description: Input Public Key outputted from the script
    default: ENTER-PUBLIC-KEY
  name:
    type: string
    title: VM Name
    description: Name of the virtual machine
resources:
  Elastic_Stack_NODE:
    type: Cloud.Machine
    properties:
      name: elastic_stack_node
      flavor: '${input.flavor}'
      image: '${input.image}'
      cloudConfig: |
        #cloudconfig
        repo_update: true
        repo_upgrade: all
        package_update: true
        package_upgrade: all
        hostname: ${input.name}
        manage_etc_hosts: true

        runcmd:
        - echo "${input.key}" >> /root/.ssh/authorized_keys
        - echo "${input.key}" >> /home/ubuntu/.ssh/authorized_keys
        - chmod 400 /root/.ssh/vmware.pub
      networks:
        - name: '${Elastic_Stack_Network.name}'
          tags: []
          network: '${resource.Elastic_Stack_Network.id}'
          securityGroups: []
          assignPublicIpAddress: false
      constraints:
        - tag: '${input.region}'
  Elastic_Stack_Network:
    type: Cloud.Network
    properties:
      name: Elastic_Stack_Network
      networkType: existing
      constraints:
        - tag: '${input.network}'
Recent Comments