
Step 2, AWS CLI and CloudFormation
Welcome back to our little project. Last time, we have outlined the concept for triggering CloudFormation templates from the vRealize Automation service catalog and today we want to talk about the AWS command line interface and how to manage CloudFormation stacks with it.
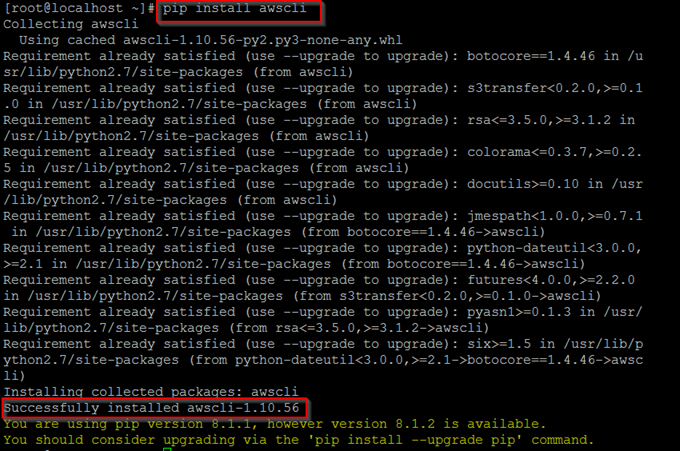
First of all, we need an additional command host to install the AWS CLI on it. I prefer a really small Linux machine, after all it only serves as a command host and so I deployed a simple CentOS virtual machine. On this machine we now have to install the AWS CLI. Depending on the OS, that is more or less challenging, in my case a simple “pip install awscli” was enough.
On the AWS docs you should find all necessary info:
http://docs.aws.amazon.com/cli/latest/userguide/installing.html
Next, we have to configure the CLI. For that we just type “aws configure” within the console. The command asks us for some information: First the AWS access key ID and the AWS secret key. Later the default region name and the default output format. Let’s first talk about the secret and the access key.
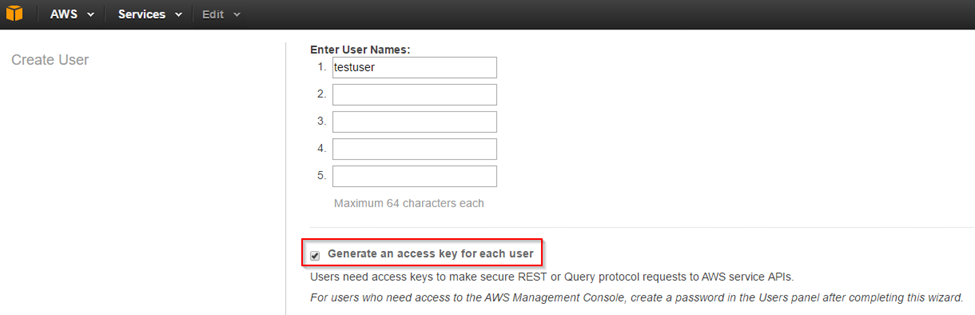
To get these, we have to log into the AWS website and create a new user in the IAM service. (Of course, for that we first have to register an account at AWS, be aware that you have to use a credit card for your registration and that many actions in AWS directly will cost money. In the first month, all we do in this example here is free.) Ensure that the “Generate an access key for each user” checkbox is chosen.
On the next screen, we now can show and download the access and secret key. Please be careful, AWS will not save the secret key, if you do not save it yourself, you will have to create a complete new key pair (you do not have to create a new user, you can generate a new key pair for an existing one.)
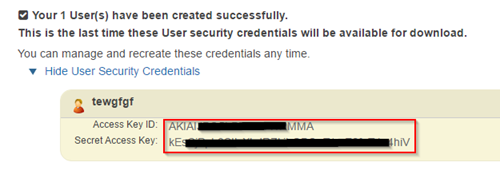
These keys we of course have to copy into the console at the configure step.
The next configure step is the region, we obviously type the region we normally use, if it doesn’t matter, we can simply hit enter for the default region. Same counts for the output type, default is JSON and that is good.
Now we can use the CLI. For starters, we can type “aws help” to see all the possibilities, or “aws cloudformation help” because that is what we want to use. To test the connection (and the keys) we type “aws cloudformation list-stacks”. If you didn’t use CloudFormation so far, there will of course not be any output, but if there is some problem, you would see the error messages now.
Let’s shortly talk about CloudFormation. CloudFormation is a central AWS means for automation. You can use CloudFormation to define any resource in AWS, configure them and create or delete them with one click. For example, we want to have a complete environment of a server cluster with special configuration, prepared network, perhaps load balancers and so on, we can define all these elements in a CloudFormation template and to create this environment, we only have to create a so called “CloudFormation stack” with this template. The template can of course be parameterized and we can define any AWS element with it, not only EC2 instances but also S3 buckets, DynamoDB tables and so on.
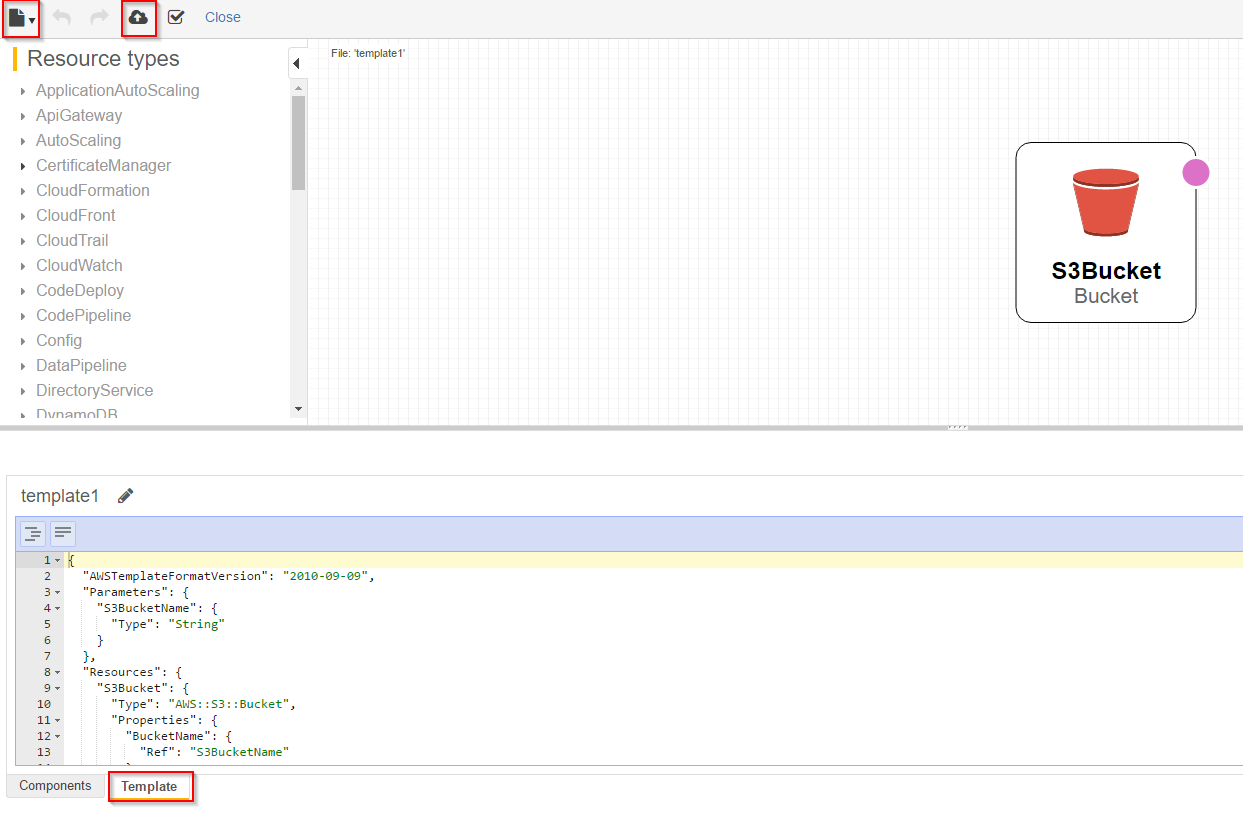
That means, we now need a template. For this blog I will use a very simple and cost free example, but you can use whatever template you want, because we can treat any stack the same. My template will create a new S3 bucket and expects a parameter for the bucket name:
{
  "AWSTemplateFormatVersion": "2010-09-09",
  "Parameters": {
    "S3BucketName": {
     "Type": "String"
    }
  },
  "Resources": {
    "S3Bucket": {
      "Type": "AWS::S3::Bucket",
      "Properties": {
        "BucketName": {
         "Ref": "S3BucketName"
       }
      }
    }
  }
}
These templates have to be in JSON, like most of the communication with AWS works with JSON. There are many examples for templates in the docs, you can start here:
https://aws.amazon.com/cloudformation/aws-cloudformation-templates/
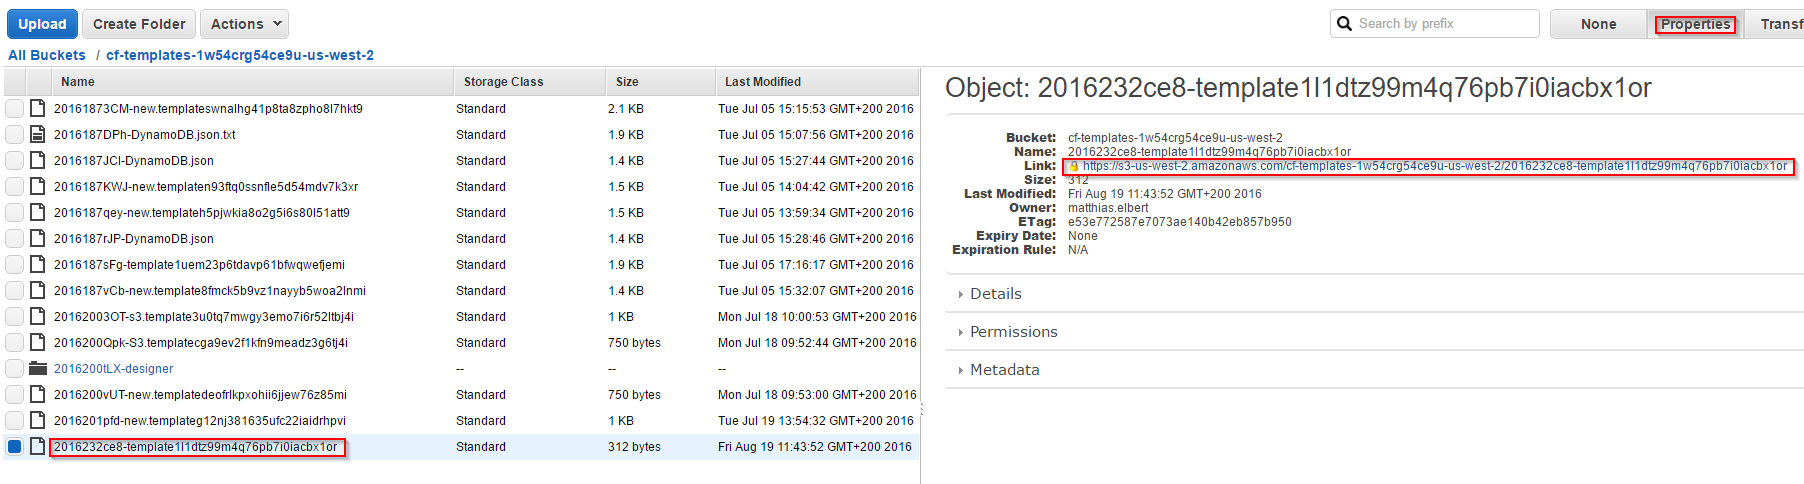
Before we try out the CLI, we should test the template in the CloudFormation designer online, there we can also save the template in a S3 bucket itself. That has the advantage, that we can simply create a new stack by providing the unique link of the file in the bucket instead of saving the file on the proxy host.
Now we can test it with the cli and simply type:
“aws cloudformation create-stack –stack-name example –templateurl linkFromAbove –parameters ParameterKey=S3BucketName,ParameterValue=newBucketName”

And hopefully we get back a StackId. In the AWS website we now can check, if it was successfully created. Remember that a bucket name has to be completely unique, because it is or can be public.

It looks good already, now we can for the sake of completeness test, if we see the outcome in the CLI. For that we type “aws cloudformation describe-stacks”.

This command not only tells us the Id, but also the status and it would tell us output variables, if the template would create some.
Now we are ready to use this host as a proxy for our dynamic types in the vRealize Orchestrator. This will be the topic of the next blog entry, stay tuned!
Recent Comments