
After having explained the terminology in the last blog entry, I’ll like to show how to actually get ECS up and running. The goal is to set up an Apache web server by using the httpd container image, which is out-of-the-box available. The httpd container image is the official Apache container image for docker. The example in this blog post can also be done with other container images, however, depending on the container image, there could be additional parameters, which need to be configured.
First of all, let’s quickly summarize, what we are going to do in this blogpost:
- Setting up the cluster
- Creating the task definition
- Creating an ECS role
- Set up an EC2 container instance with the container agent installed and add it to the cluster
- Setting up a service based on the httpd container
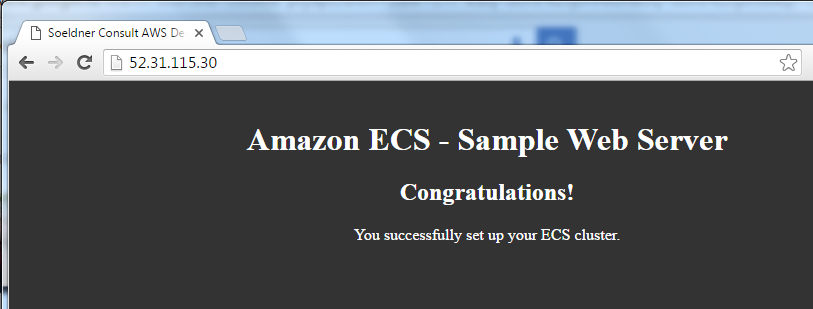
- Check whether our EC2 container instance is displaying our website which we configured as part of the task definition
Setting up the ECS cluster
To set up a cluster we’ll have to switch to the ECS menu. When you use ECS for the first time, it will lead you to the “first run” wizard, which allows you to deploy a sample application on an EC2 cluster. This will result in something similar to what we are trying to achieve in this blog post. However, as you will not rely on the wizard in the future, you should know how to configure ECS yourselves.
In case you would like to return to the wizard, just enter the following URL (here for the us-east-1 region):
https://console.aws.amazon.com/ecs/home?region=us-east-1#/firstRun
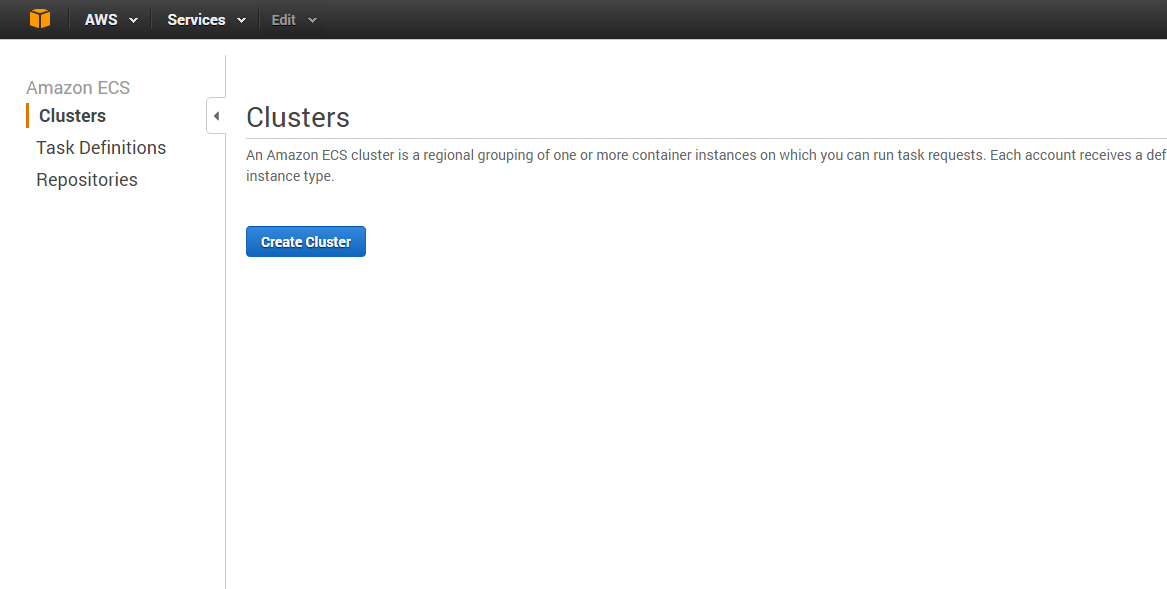
As we are setting up everything ourselves, let’s click on Cancel here. This will lead us to the main view, which looks rather simple (see screenshot). The “Create Cluster” button already leads us on the right track.
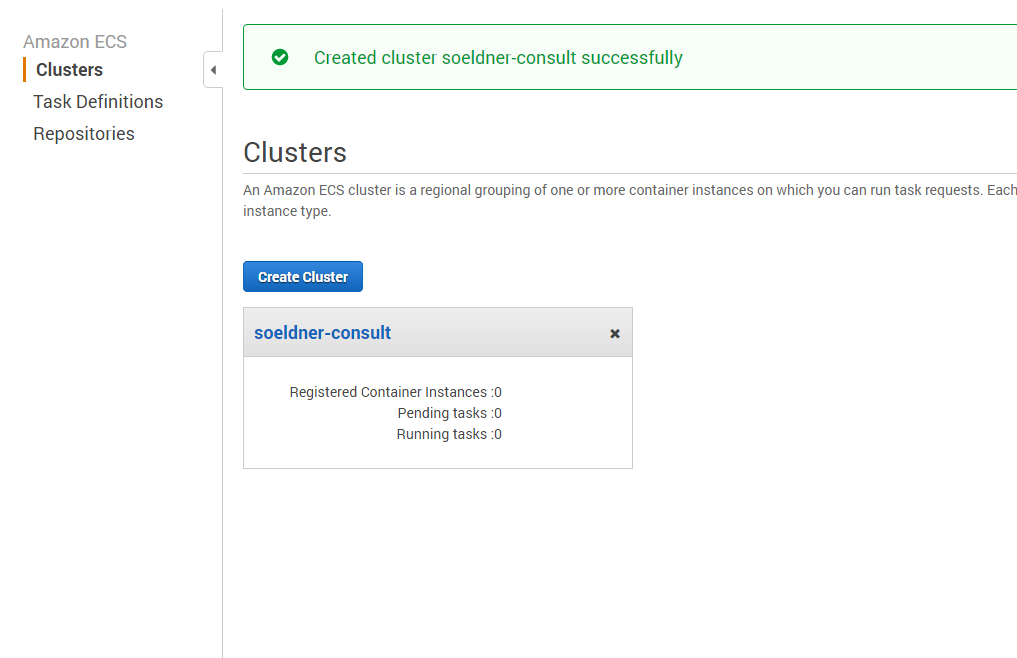
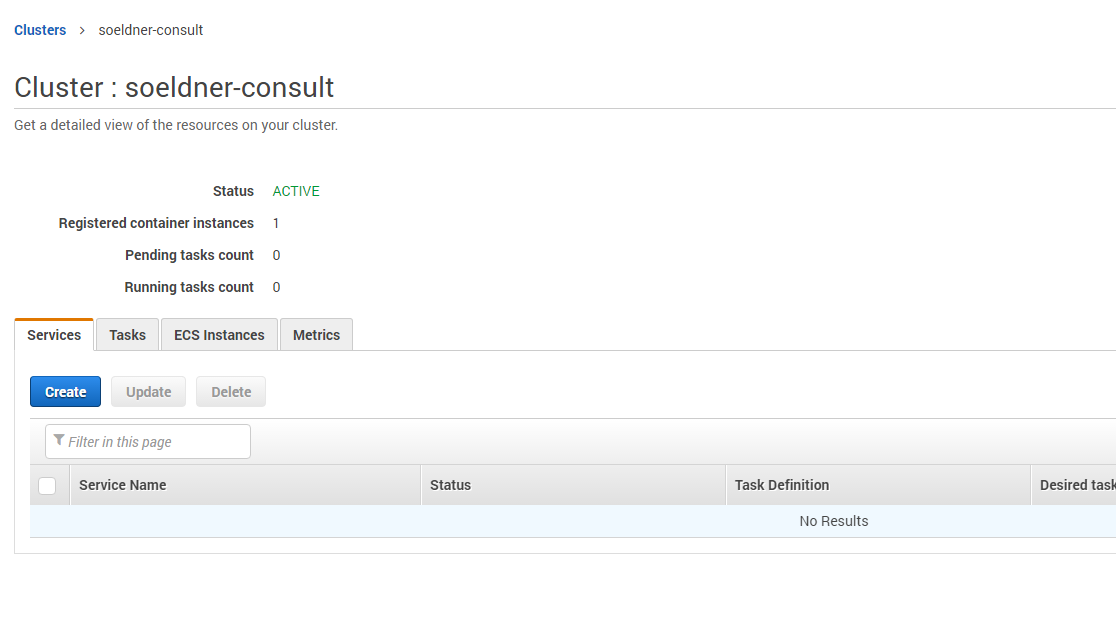
After supplying a cluster name (here “soeldner-consult”), click on Create.
Creating the task definition
In the first part in this article series we were already introducing the concept of task definitions. To repeat it once more, a task definition describes one or more container images which need to run on the same EC2 container instance. However, you can run multiple instances of a task definition. A task definition is also created independently from a particular cluster.
If you already have some experience with ECS, you might just setup the task definition by providing a JSON definition. If not, the basic configuration can also be done graphically. First of all, we need to give the task definition a name, in this example we’ll call it httpd. This name already describes the purpose of this task definition, namely being a template for a httpd container (httpd is the container image for Apache). A task can also consist of multiple containers, thus defining different components for an application.
Within a task definition you can define multiple containers. Each container is based on an image which will be run in the container. Fortunately you’ll already have access to all images stored in Docker Hub. To explore what else is available in Docker Hub, just follow this link: https://hub.docker.com/
However, you could also reference images from your own repository provided by ECR (Amazon EC2 Container Registry). We will show how to work with ECR in a later post.

Fill out the following fields:
- Container Name: e.g. httpd-container
- Image: httpd:2.4
- Maximum memory (MB)*: 256
- Port mappings: 80 (Host port), 80 (Container port)
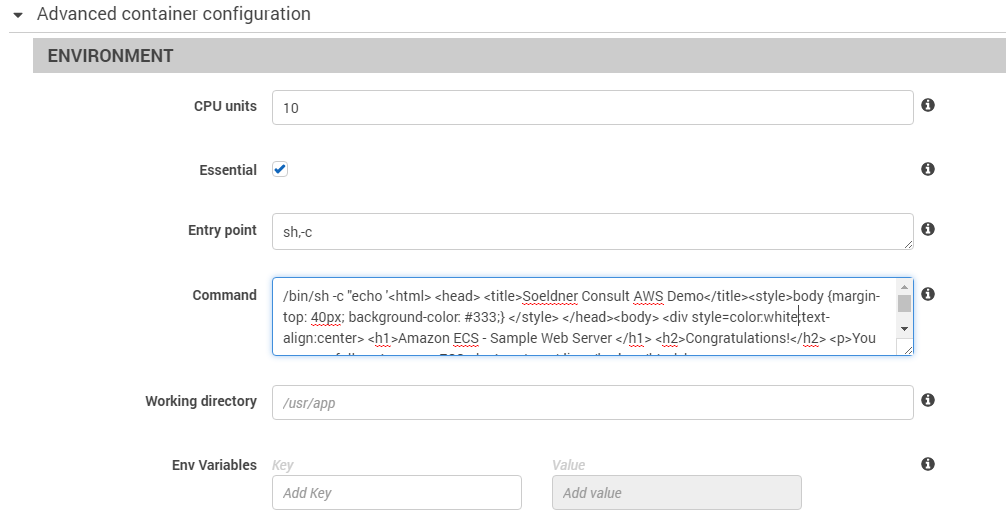
- CPU Units: 10
Scroll down a little bit and fill out the command section with the following command:
/bin/sh -c "echo '<html> <head> <title>Soeldner Consult AWS Demo</title><style>body {margin-top: 40px; background-color: #333;} </style> </head><body> <div style=color:white;text-align:center> <h1>Amazon ECS - Sample Web Server </h1> <h2>Congratulations!</h2> <p>You successfully set up your ECS cluster.</p> </div></body></html>' > /usr/local/apache2/htdocs/index.html && httpd-foreground"
After filling out these fields, click on ‘Add’ to close the window and then click on “Create” in order to save your task definition.
As the task definition is merely the ‘template’ which is used to set up one or more container instance, you still need to specify how many tasks should run based on this task definition. To achieve that, we will in the next step create a service.
Creating an ECS role
Before we can create an EC2 container instance, we need to set up an IAM role, which allows the EC2 container instance to connect to the cluster. This allows the EC2 container agent to make API calls to ECS. To create the ECS role, perform the following steps:
- Switch to IAM.
- Click on “Roles” on the left side and then on “Create New Role”.
- Give your role a name, e.g. ecsInstanceRole.
- As a role type, select “Amazon EC2”.
- As a policy, attach “AmazonEC2ContainerServiceforEC2Role“.
- In the Review pane, click on “Create Role”
With the new ECS role, we now have all the prerequisites to set up an EC2 container instance which will become part of our cluster.
Deploying an EC2 container instance
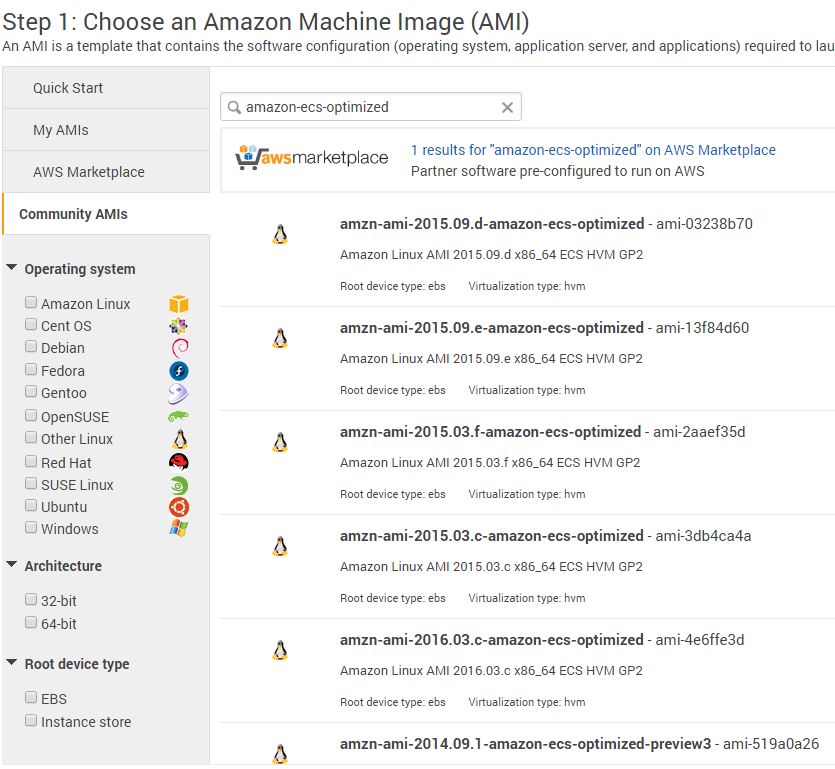
AWS already offers an AMI (Amazon Machine Image) containing the ECS container agent which already waits for us to be deployed. The Docker AMI is part of the Community AMIs, which can be selected when launching a new EC2 instance. The best way to find it is by searching for amazon-ecs-optimized. However, you’ll get multiple results with different versions of the container agent as well as of Docker. For an overview of the different versions, you can check out the ECS documentation (http://docs.aws.amazon.com/AmazonECS/latest/developerguide/container_agent_versions.html)
Currently the most current version is 2016.03.c which runs with the docker version 1.11.1.
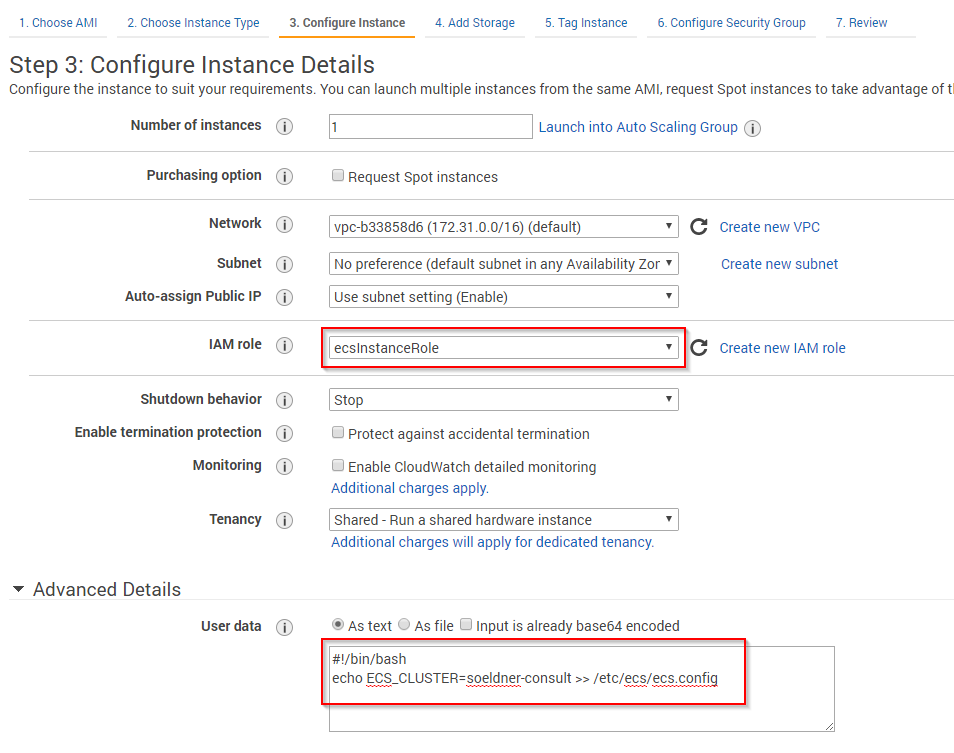
You can set up the EC2 instance according to your liking. We’ll skip a couple of steps here, such as the selection of the instance type, as it is completely up to what size your EC2 machine should have (I am taking the t2.micro instance, as it is part of the AWS free tier). However, there are a couple of things you should pay attention to:
- Make sure, that you enable “Auto-assign Public IP”
- Another important step is to supply a user data script which configures the EC2 container agent. This script is shown in Listing X. The script is rather simple and in essence, you just specify the cluster, to which the EC2 container instance should register to after startup.
#!/bin/bash
echo ECS_CLUSTER=soeldner-consult >> /etc/ecs/ecs.config
The user data script in this case just sets the ECS_CLUSTER parameter to soeldner-consult. If you do not set this parameter, the machine will automatically try to register to the default cluster after booting (in case you have a default cluster).
- Make sure, that you’ll later set up your security group correctly. As we would like to run a webserver and also see if the web server can be reached via the browser we need to allow inbound access from port 80 (Allow HTTP traffic from Anywhere).
The next steps are pretty straightforward and do not differ to other EC2 instances (like setting up a volume, select a key pair…). Therefore, we do not cover it here in detail.
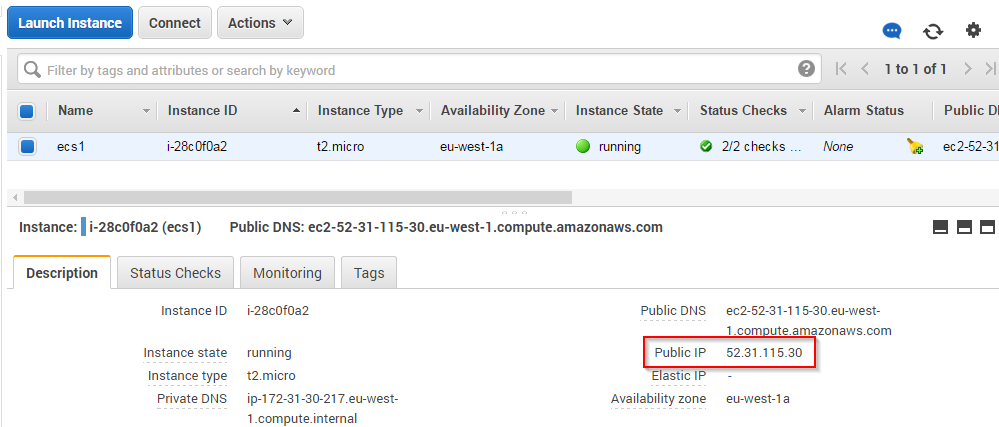
After you launched the new instance, wait a little bit to make sure it is up and running, and a public IP address is assigned to it.
Create the service
With our EC2 container instance in place, we can now continue to create a service in ECS. Once again, if you forgot, what a service in ECS is, just have a look again at the first part of this article series (Click Here).
After returning to the ECS menu, go to your cluster by clicking on “Clusters” on the left side and then select your cluster (in our case “soeldner-consult”. Under the Service tab, click “Create”
In the Create Service menu, select your newly created task definition and supply a service name, e.g. “httpd-service”.
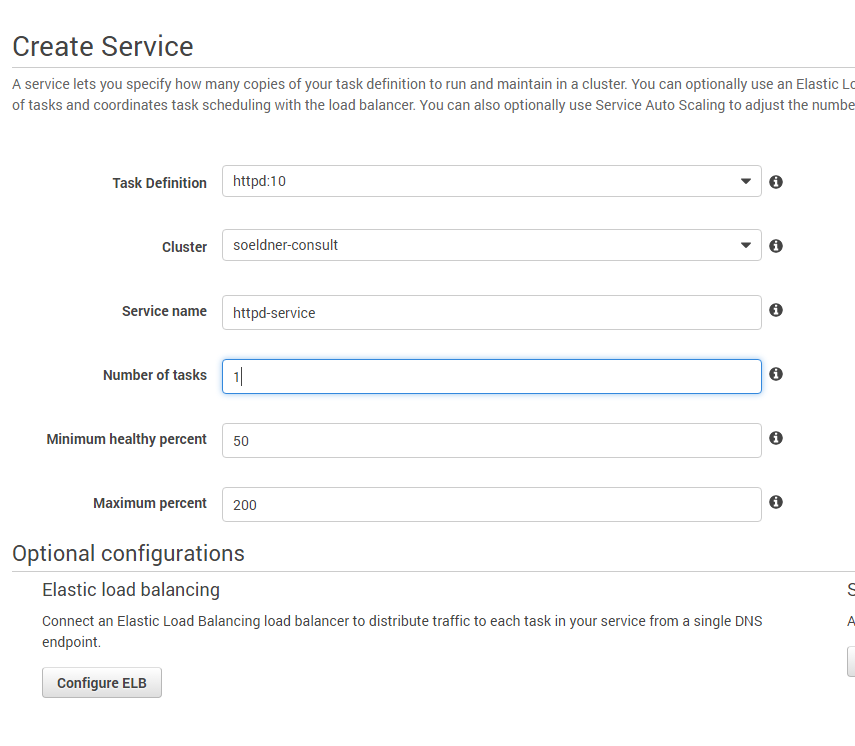
In order to have one instance of your task running, set “Number of tasks” to 1. After that click on “Create Service”. In the next window you will see that the service was successfully created:

Click on “View Service”, to see the details of your service. After a little while, the status of your services turns to “Active” and you’ll see one running task.

So far, this looks quite good. In order to see whether your web server container is really up and running, let us just switch to the web browser and see, if the web site has been properly set up. Just find out the public IP of your EC2 instance (see the screenshot) and copy it into the browser bar.
If everything works properly, you should get a similar output:
Trackbacks/Pingbacks